WordPress has a default page which is called “Home” and every new WordPress website comes with it. We use this page to automatically redirect our website’s visitors to the home page.
However, there might be times when you want to unpublish this page. Maybe you’ve created a new home page and you want to make the old one inaccessible. Or maybe you’ve decided that you no longer want your website to have a home page.
Why Unpublish a WordPress Page?
There are several reasons why you might want to unpublish a WordPress page. Here are some of the most common reasons:
You’ve created a new home page and you want to make the old one inaccessible.
You’ve decided that you no longer want your website to have a home page.
You’ve moved your WordPress site to a new domain name and you want to redirect all of the old traffic coming in to the new site.
You’ve set up your WordPress site as a subdomain and you want to remove the home page from the main domain.
Method 1: Unpublishing a Single WordPress Page -Switch to draft
If you’d like to unpublish a WordPress page, but want to keep the code intact so that you can republish it later, use this method.
1. Login to the Dashboard of your WordPress site 2. Click on “Pages.” 3. Find the page that you want to unpublish and hover over it. 4. Click on the “Settings” tab. 5. Under “Publish,” change the status from “Published” to “Draft.”
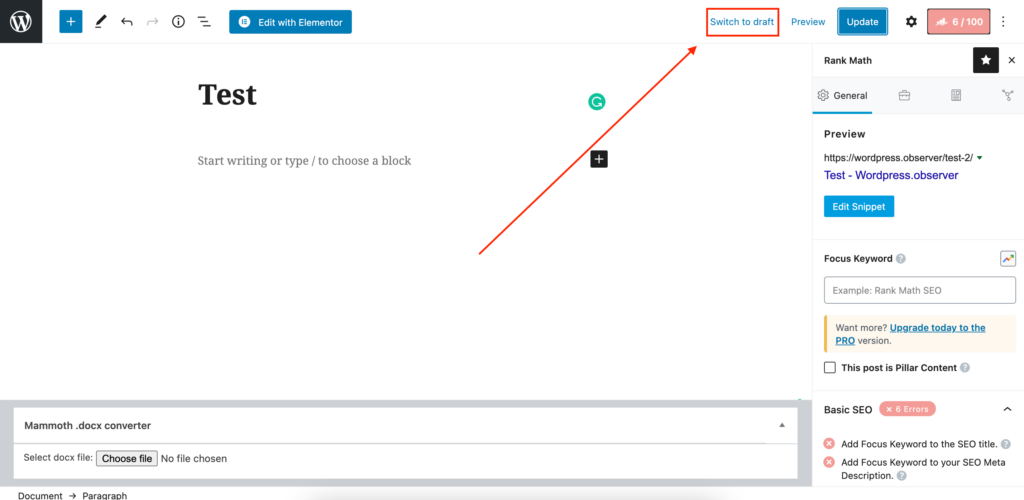
If you change a page’s status to draft, the only people who will be able to see it are those with Administrator or Editor roles on your WordPress site.
You can republish the page at any time by changing it to “Published” again.
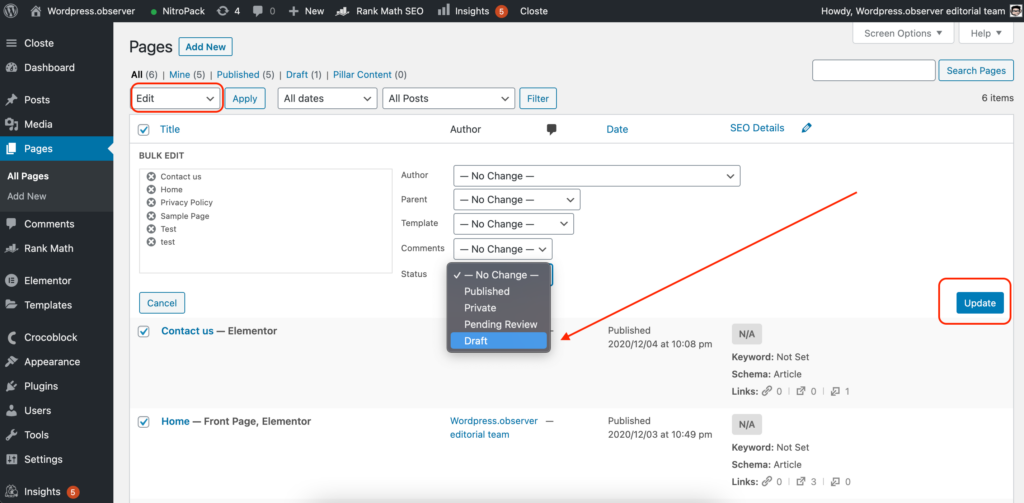
Method 2: Unpublishing All WordPress Pages – Quick Method
If you want to un-publish all of the pages on your website, use this method.
1. Login to the Dashboard of your WordPress site 2. Click on “Pages.” 3. Select “All” from the drop down menu in the “Show” section. 4. Click on the “Settings” tab for each page and set the “Published” option to “Draft.”
Method 3: Making a WordPress Page Private or Password Protected
If you want to keep the page completely hidden from visitors, use this method instead. There are two ways that you can do this:
Option 1: Making a WordPress Page Private
If you want to make your page completely private, so that visitors can’t see it at all, you can do so using this method.
1. Login to the Dashboard of your WordPress site 2. Click on “Pages.” 3. Find the page that you want to make private and hover over it. 4. Click on the “Settings” tab. 5. Under “Visibility,” change the option to “Private.”
Option 2: Making a WordPress Page Password Protected
If you want people to have to type in a password before they are able to view the page, use this method.
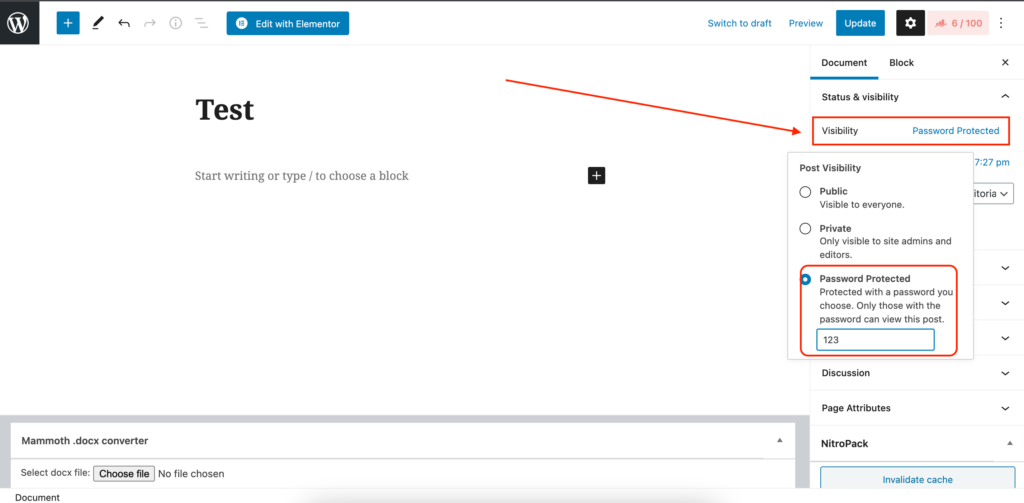
1. Login to the Dashboard of your WordPress site 2. Click on “Pages.” 3. Find the page that you want to password protect and hover over it. 4. Click on the “Settings” tab. 5. Under “Visibility,” change the option to “Password Protected.”
Type in a password that you want to use and make sure that you remember it! You will need this password in order to view the page.
Method 4: Using a Plugin to Unpublish a WordPress Page
If you want an easier way to unpublish a WordPress page, you can use a plugin to do it for you. Here are two plugins that can help you with this:
1. Remove Published Pages Plugin 2. Quick Page/Post Delete Plugin
Both of these plugins are available as free downloads from the WordPress plugin directory.
Once you have installed the plugin, follow the included instructions to set it up. When using either of these plugins, you will have the option to keep the page in your database or completely remove the page content.
Method 5: Making a WordPress Page Members Only
If you want visitors to need to log into your site before they can view your page, use this method.
1. Login to the Dashboard of your WordPress site 2. Click on “Pages.” 3. Find the page that you want to make members only and hover over it. 4. Click on the “Settings” tab. 5. Under “Visibility,” change the option to “Members Only.”
Type in the email addresses of the people who you want to have access to this page. You can add both the email addresses of new members and/or any current members who you want to give access to this page.
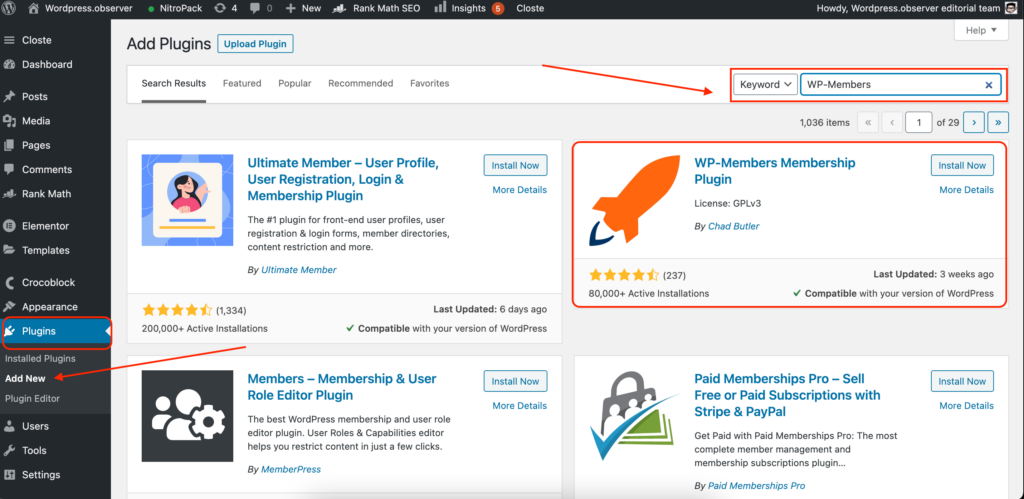
Which plugins can add this options for members?
There are a number of plugins that can help you add this functionality to your WordPress site. The most popular plugin for this is the WP-Members plugin.
This plugin is available as a free download from the WordPress plugin directory. Once you have installed and activated the plugin, follow the included instructions to set it up.
Leave a Reply